A new student stands in my studio, working hard on a phrase that keeps costing more than it should. I reach into a drawer and hand over a drinking straw. I get the look — the one that says, I signed up for voice lessons and you're handing me a straw. Ninety seconds of gentle buzzing later, we take the straw away, and the same phrase comes out easier. The eyes change. Not because anything about the voice was fixed — nothing was broken — but because for the first time, the body felt what efficient sound is like. The straw didn't teach the note. It taught the feeling. Then it got out of the way.
That’s the whole game, and it’s what this guide is about: what straw phonation is, and how to make what it shows you stick.
What Is Straw Phonation?
Straw phonation is making sound through a straw instead of an open mouth. The narrow opening partly closes off your vocal tract — the space between your vocal folds and your lips — and that partial closure changes the pressure and acoustics inside it in ways that help your voice work more efficiently.
It belongs to a well-studied family of exercises called SOVT — Semi-Occluded Vocal Tract exercises. “Semi-occluded” just means partly closed. The family is bigger than it first appears: humming, the “ng” of “sing,” sustained “vvv” and “zzz” sounds, lip trills, tongue trills, puffy-cheek phonation, cup phonation, and singing through a tube into water. Each narrows the exit in a slightly different way, and each offers its own kind of resistance and feedback. The straw is simply the most adjustable and portable member of the family — which is why it gets its own guide. For the others and my daily routine, visit the SOVT section of my Vocal Health Hub.
What’s Actually Happening in There
Your vocal folds meet and part hundreds of times per second whenever you speak or sing. How efficiently they do that determines how your voice feels: easy or effortful, fresh or worn out by evening. Sing through a straw and two useful things happen at once.
Air pressure builds gently above the folds. That raised pressure narrows the gap between the pressure below your folds and the pressure above them, so the folds can vibrate with less push from your breath. Voice scientists measure this as a drop in phonation threshold pressure — the minimum pressure it takes to get your folds vibrating. Lower threshold, easier sound.
Sound energy reflects back toward your vocal folds. The narrowed opening sends part of the sound wave back down the tract — an effect researchers call inertive reactance (Titze, 2006). That reflected energy interacts with the vibrating folds and can help them oscillate more efficiently. It’s a big part of why straw phonation, lip trills, and humming often feel easier and sound clearer than open singing: the vocal tract is momentarily giving the folds an ideal acoustic load.
There’s a deeper principle hiding in that second point, and it’s central to how I teach: resonance isn’t just the product of vibration — it feeds back and shapes the vibration itself. Breath, vibration, and resonance continuously refine one another.
One caveat, because good information matters more than hype: research supports useful immediate and training effects. No SOVT exercise fixes every voice or treats every condition. The straw is a training tool, not a treatment.
The Real Target: Your Balancing Point
Here’s where my approach parts ways with the standard “warm up with a straw” advice.
At the center of the Adaptive Voice Framework sits a concept I call the Balancing Point: the moving point of efficient coordination where breath pressure from below and vocal fold resistance from above stay in proportion — along with resonance, body, and intention — from the first instant of sound through the phrase, the release, and the next breath.
Notice the word moving. The Balancing Point is not one perfect setting you find and lock down. It shifts with pitch, vowel, volume, style, and phrase length. Your job is to learn what balance feels like so your voice can keep finding it in real time — hundreds of times per song, thousands of times per speaking day.
That’s what the straw is really for. Its back pressure steadies the meeting place between breath and folds, which makes balance suddenly easy to feel: sound starts right on time, stays steady without pushing, and the next breath arrives on its own. My student in the opening story didn’t learn a trick. They felt their Balancing Point — many for the first time on demand.
And that word — transfers — is the step most easily skipped. The straw work below always ends with the straw coming away.
The Core Practice
Equipment: a clean straw with comfortable resistance — plus, optionally, a glass or bottle of water.
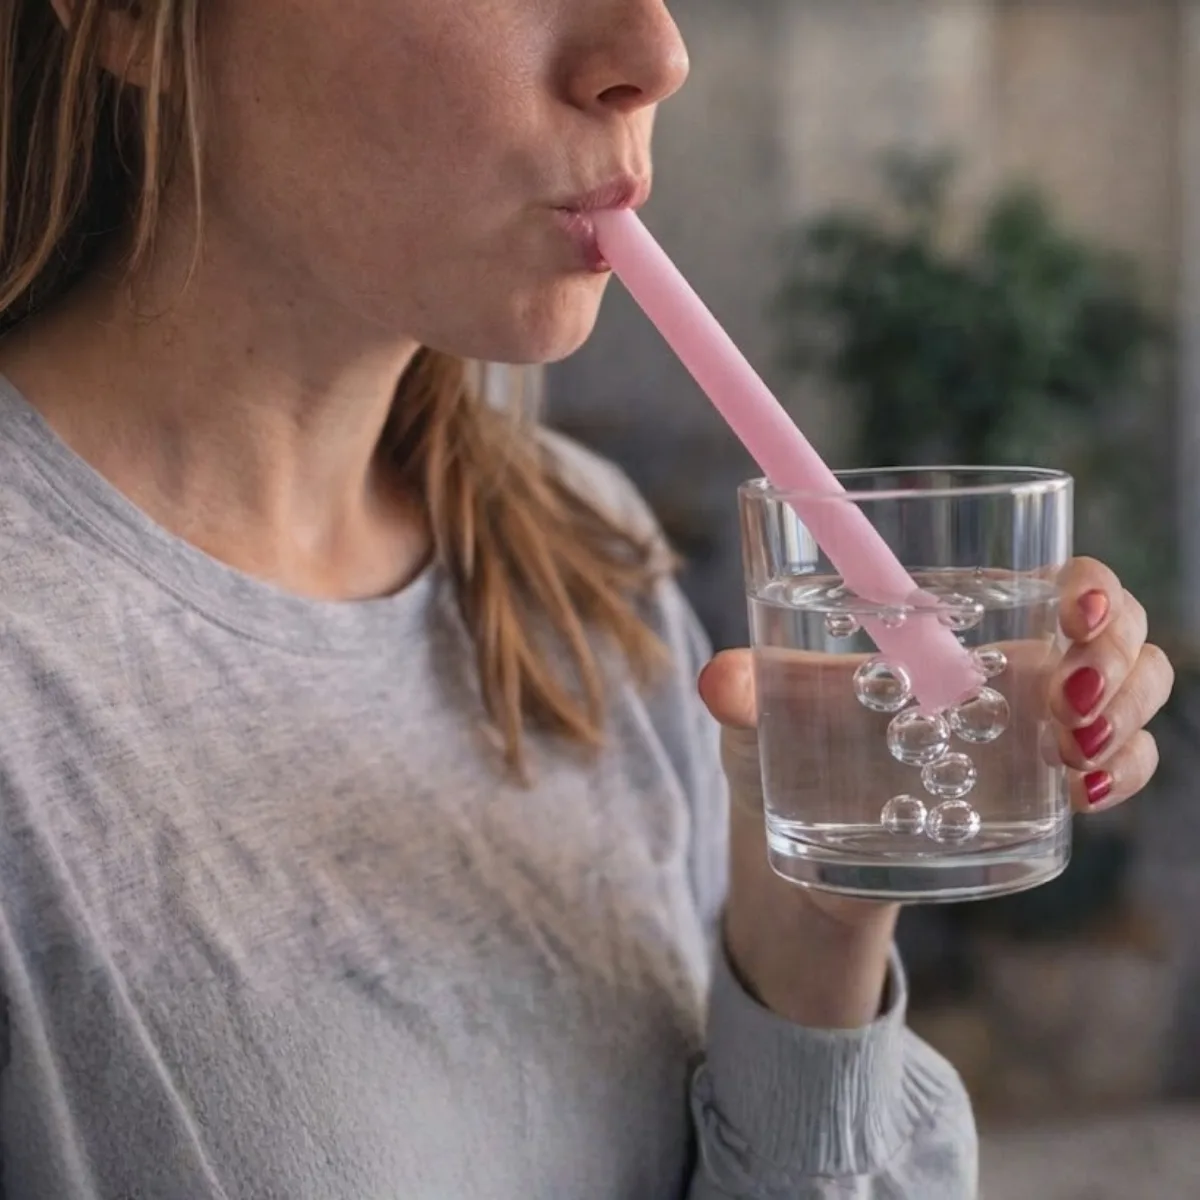
- Place the straw between your lips — gentle seal, no biting, cheeks relaxed.
- Blow silent air through the straw for a second to feel the pathway.
- Add a gentle tone at a comfortable pitch. Aim for steady sound, not maximum duration or volume.
- Glide slowly up and down through a small range, keeping the sound continuous. Then sing a simple five-note pattern.
- If you’re using water, keep the straw tip just below the surface and make small, even bubbles — never explosive ones.
- Transfer — don’t skip this: remove the straw and sing “oo,” keeping the exact same ease. Then a short phrase. Then the words. If the open sound is harder than the straw version, don’t push through it — make the step smaller and try again.
Dose: one to three minutes is plenty, broken into ten- to twenty-second bouts with rest between them. Use the smallest dose that makes the next task easier. Daily beats marathon.
If you would like the straw sitting inside a full daily routine, the Online Voice Studio holds printable warm-up plans on shelves named for what you are looking for, along with Vocal Fit, a recorded warm-up where I demonstrate every exercise out loud and you follow along.
Signals worth listening to:
- Good response: easy, steady sound; quiet throat; small even bubbles; open singing afterward feels the same or easier.
- Adjust: explosive bubbles mean reduce air pressure — phonation should stay gentle. Sound hard to start means the straw is probably too narrow or the lips are gripping — go wider and soften the seal.
- Stop: pain, marked throat pressure, dizziness, or increasing roughness. A good session finishes with your voice feeling the same or easier — never worse.
Four Ways to Aim It
Once the core practice feels natural, the straw becomes a precision tool. Point it at whatever your voice needs most.
1. See your airflow
Steady airflow is the foundation of everything the voice does — and it’s usually invisible. Sing through a straw into water and your airflow becomes a stream of bubbles you can watch. The bubbles should be a gentle, even simmer — never a rolling boil. That steadiness is efficient breath, made visible. Glide your pitch up and down and see if the simmer stays even the whole way. And don’t manufacture a big inhale first: take a quiet, comfortable breath and let the straw show you how little air a well-coordinated voice actually needs.
2. Smooth your register transitions
Most voices have a spot where they want to shift — singers know it as the move between chest voice and head voice. Sustain a few easy pitches through the straw, then take one slow siren from low to high and back, keeping the sound continuous. The back pressure smooths the shift enough that the zone that used to feel unstable becomes a place you can visit with curiosity. The shift still happens — it should — but each smooth pass teaches your voice that the transition is safe. If you have a strong break, work in small glides around it rather than forcing one giant siren through it.
3. Clean up your onsets
An onset is the first instant of a sound — the moment breath becomes tone. In the framework I name three types, all healthy, all expressive: aspirate (“hah” — air first, soft and warm), coordinated (air and closure arrive together — clean and easy), and glottal (closure first — percussive and definitive). The coordinated onset is home base, and the straw invites it almost automatically. Sing five short, separate notes on one pitch through the straw — gentle pulses, small silences between. Notice each start: no click, no puff, right on time. Then set the straw down and begin five notes the same way. For speakers, that easy start becomes the first word of every sentence.
4. Lower the cost of a phrase
Take a phrase that always feels expensive. Sing or speak it your usual way and notice where the effort lives. Now do it through the straw — same melody, same rhythm — and feel the cost drop. Then alternate: straw, “oo,” words, straw, words, until the open version feels just as economical. Less effort, same or better result. For the speakers reading this — teachers, coaches, pastors, anyone who talks for a living — this progression with spoken phrases is one of the fastest routes I know to an efficient everyday voice, and a few minutes before a long speaking day (plus brief resets between blocks) is one of the best investments you can make.
Choosing Your Straw: Resistance Is the Dose
Diameter, length, and water depth all set the dose, and here’s the most important thing I can tell you about choosing: more resistance is not automatically better. The right straw produces an easy, steady sound with a quiet throat — and a smoother transfer into open singing or speech.
- Start with comfortable resistance. A regular drinking straw is a fine place to learn the feel. If the sound starts easily and your throat stays quiet, you’re in the useful zone.
- Narrower straws raise the dose. A skinnier straw (roughly coffee-stirrer territory) is a common next step for dry practice — stronger back pressure, clearer feedback. That’s a fine progression if the sound still starts easily and nothing pushes. If phonation gets hard to start, or you feel pressure in your throat or ears, go wider or softer. The exercise should never become a contest to create maximum back pressure.
- Water adds resistance and feedback. Keep the straw tip just below the surface — an inch at most — and sing small, even bubbles. Deeper water means more pressure, not more benefit; keep it shallow for self-directed practice.
- Purpose-built tools are optional. Devices like the PocketVox offer calibrated, consistent resistance, which some daily practicers appreciate. But no branded tool is required — the goal is a coordination that transfers into your ordinary voice, not loyalty to a device.
When the Straw Isn’t the Answer
These exercises support a healthy voice and help a tired one recover from ordinary use. They are not a treatment for an unexplained voice change. If your voice changed suddenly, hurts when you use it, or has been hoarse for more than about four weeks — sooner if you have pain, trouble breathing, or the change followed forceful use, illness, or surgery — see a laryngologist first. A voice-specialized speech-language pathologist can then guide rehabilitation; many clinical voice therapy programs use these same SOVT tools, dosed for your specific situation. Training works best once you know the instrument itself is healthy.
After heavy voice use, a minute or two of easy straw phonation or humming also makes a pleasant optional cool-down. It’s not a detox and it isn’t required — but it helps you notice whether your voice is returning toward ease, and that information is valuable.
Frequently Asked Questions
What does straw phonation do for your voice? Straw phonation creates gentle back pressure and reflected sound energy that help the vocal folds vibrate efficiently, lowering the pressure it takes to start and sustain a sound. In practice that means sound starts more easily, tone steadies, and singing or speaking afterward often feels clearer and less effortful. It also builds skill: steady airflow, coordinated onsets, smoother register transitions, and a felt sense of balanced effort.
What is the “Balancing Point” in singing? The Balancing Point is a core concept of the Adaptive Voice Framework: the moving point of efficient coordination where breath pressure, vocal fold resistance, resonance, body, and intention stay in proportion throughout a phrase. It isn’t one fixed setting — it shifts with pitch, vowel, volume, and style. Straw phonation is one of the most direct ways to feel it, because the straw’s back pressure steadies the meeting place between breath and folds.
How long should you practice straw phonation? Less than it might seem. One to three minutes, broken into ten- to twenty-second bouts with rest, is a complete session — and daily practice is where the benefit compounds. Use the smallest dose that makes your voice feel easier, and always finish by transferring the ease into open singing or speaking.
What size straw is best for straw phonation? The one that gives an easy, steady sound with a quiet throat. A regular drinking straw is a good starting point; a narrower straw is a common next step for stronger feedback in dry practice, and any straw works in shallow water, where bubbles add resistance you can see. More resistance is not automatically better — if sound is hard to start or your throat pushes, go wider.
What other SOVT exercises are there besides straw phonation? The SOVT family includes humming, the “ng” of “sing,” sustained “vvv” and “zzz” sounds, lip trills, tongue trills, puffy-cheek phonation, cup phonation, and singing through a tube into water. Each creates helpful back pressure in a slightly different way, and the best one is whichever gives you an easy sound that transfers. If you can’t do a lip trill, that’s a coordination variation, not a problem — use the straw or a hum instead.
Is straw phonation good for aging voices? It’s one of the tools I recommend most for singers and speakers noticing age-related change, because it supports easy, regular vocal conditioning with low strain. Older voices often do best with a wider straw, shorter glides, and more rest between bouts. One caution: new or increasing breathiness and sudden weakness are not automatically “just aging” — those deserve a laryngeal evaluation before training. (For more on what causes breathiness and how to address it, see my guide to fixing a breathy voice.)
Does straw phonation work for speaking voices too? Absolutely. Speaking short phrases through a straw, then repeating them without it while keeping the same ease, is one of the fastest routes I know to an efficient everyday speaking voice. Teachers and presenters can use a few minutes of straw work before the day and brief resets between speaking blocks. If you’d like a routine built for your specific voice, reach out for a free 15-minute discovery call.
Ted Chamberlain teaches voice at Ted’s Voice Academy in Lacey, Washington. Straw phonation — along with the complete system it belongs to — is covered in depth in his Adaptive Voice Framework guides. Curious what balanced, easy voicing feels like in your own voice? Book a free 15-minute discovery call.